 Gothic Home Decor
Wallpaper installation can transform a dull room into a stunning space with minimal effort. Whether you’re refreshing a bedroom or adding flair to a living area, proper wallpaper installation starts with the right preparation and technique. I’ve helped countless homeowners tackle this project, and the key is patience paired with smart steps. In this guide, we’ll dive deep into everything you need to know for successful wallpaper installation.
Why Choose Wallpaper Installation?
Wallpaper offers endless design options compared to paint alone, making wallpaper installation a favorite for personalizing spaces. From bold patterns to subtle textures, it adds depth and warmth that flat paint simply can’t match, while being surprisingly durable—high-quality papers hold up for years without fading.
Many homeowners turn to wallpaper installation during updates because it’s fully reversible, unlike permanent fixtures such as tiles, allowing easy changes down the line. Costs make it accessible too; DIY wallpaper installation typically ranges from $2 to $10 per square foot for materials, offering great value. Key pros include hiding wall imperfections effortlessly, quick coverage for big areas, and a boost to home value—a stylish accent wall can lift resale appeal by 5–10%.
Types of Wallpaper for Installation
Selecting the right wallpaper type is crucial for smooth wallpaper installation, as each handles differently based on your room’s needs. Traditional paper suits dry areas like living rooms, delivering classic elegance, while vinyl stands up to moisture in kitchens and baths without peeling. lets figure out Types of Wallpaper
Peel-and-stick wallpaper has become a game-changer for beginner-friendly wallpaper installation—simply peel off the backing, position, and smooth, skipping messy paste altogether. It’s incredibly forgiving, repositionable, and perfect for renters. Fabric-backed varieties bring luxurious texture, ideal for cozy bedrooms or formal dining spaces, but opt for lightweight papers on curves and heavier vinyl in high-traffic spots to ensure longevity.
Essential Tools for Wallpaper Installation
Before diving into wallpaper installation, assemble your tools to keep things efficient and frustration-free—no one wants store runs mid-project. Start with basics like a smoothing brush, sharp utility knife, and reliable level to ensure straight hangs.
You’ll also need wallpaper paste (pre-mixed for ease or powder for pros), a seam roller for crisp edges, drop cloths to protect floors, and buckets for mixing. A laser measure adds precision, especially in uneven rooms. Seasoned DIYers swear by a dedicated wallpaper table for pasting strips flat, turning the chore into a streamlined process.
Preparing Walls for Wallpaper Installation
Wall preparation accounts for about 70% of a flawless wallpaper installation—skimp here, and you’ll battle bubbles or peeling later. Begin by deep-cleaning surfaces with a TSP solution to strip away grease, dust, and old residue, ensuring strong adhesion.
Next, tackle imperfections: fill cracks with spackle, sand glossy paint lightly, and apply a solid primer coat. Oil-based primers work best on porous walls, blocking excess paste absorption and promoting even drying—give it a full 24 hours. Always test on a small patch: paste a scrap piece, stick it up, and check for hold after 48 hours before committing to the full wallpaper installation.
Measuring and Cutting for Perfect Installation
Precision measuring prevents costly mistakes in wallpaper installation, so calculate your room’s square footage carefully—multiply wall height by width, then add 10–15% buffer for errors or pattern matching.
Unroll the roll and cut full strips to exact wall height plus 2–4 inches extra at top and bottom for trimming. Label each strip sequentially to maintain order, and drop a plumb line from the ceiling for truly straight alignment, since walls often aren’t perfectly plumb. Pay close attention to pattern repeats, usually 18–27 inches, to avoid awkward mismatches that could waste entire rolls.
Applying Paste During Wallpaper Installation
Mastering paste sets your wallpaper installation apart from amateur attempts. For non-pasted papers, brush on adhesive generously from the center outward, then “book” the strip by folding sticky sides together and letting it rest 3–5 minutes to activate.
Work in sections to dodge drips, wiping any excess right away with a barely damp sponge. Paste-the-wall papers flip the script: roll adhesive straight onto the prepped wall, which excels with heavier textures and cuts down on bubbles significantly. This method has saved many a project during humid days.
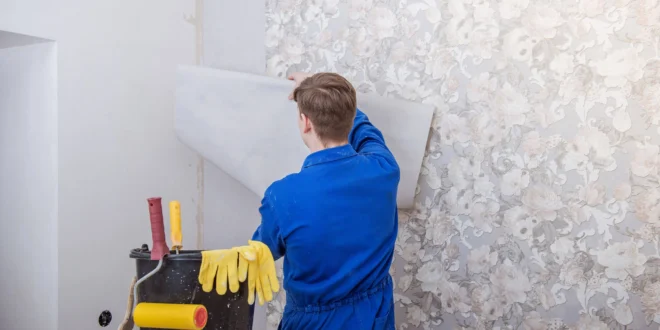
Hanging Wallpaper: Step-by-Step Installation
The hanging phase is where wallpaper installation magic happens—begin in an inconspicuous corner using your plumb line as a guide for the first drop. Position the strip carefully, letting overlaps drape over ceiling and baseboard.
Smooth methodically from the center outward with a brush or plastic smoother, pushing air pockets toward edges where they vanish easily. Butt seams lightly without overlap, then seal with a seam roller for invisible joins. Trim excesses at top and bottom using a fresh blade and steady ruler. Proceed strip by strip, constantly re-plumbing and pattern-matching for a pro finish.
Handling Windows, Doors, and Obstacles
Obstacles like windows and doors test your wallpaper installation skills, but with practice, they yield seamless results. For windowsills, cut the paper to contour, leaving extra to fold neatly around the frame—score edges precisely before peeling.
Electrical outlets demand caution: turn off power, slit paper to fit plates, and smooth around. Use a flexible tool for rounded corners or pipes. Doors work similarly—vertical cuts to the frame, then trim for a clean wrap, practicing on scraps first to build confidence.
Common Mistakes in Wallpaper Installation
Pitfalls plague even experienced hands in wallpaper installation, but knowing them helps you sidestep disaster. Rushing the paste “booking” time leads to dry edges and peeling; always wait the full few minutes.
Pattern mismatches from poor planning waste materials, while inadequate wall prep invites persistent bubbles. Overstretching seams creates gaps—ease into place instead. Patience turns these traps into triumphs.
Finishing Touches After Installation
Post-hang inspection polishes your wallpaper installation. Roll all seams once more for rock-solid bonds, then gently clean glue smudges with soapy water, never oversaturating the paper.
Hold off on hanging pictures or shoving furniture back for 24–48 hours. Spot-repair any lifts promptly with dabbed paste. These steps ensure your walls stay pristine.
Cost Breakdown for Wallpaper Installation
Planning finances upfront makes wallpaper installation stress-free. Materials alone hit $1–$5 per square foot, with tools adding a one-off $50–$100 if you’re starting fresh.
A standard 12×12 room DIY might total $300–$800. Professional services charge $5–$12 per square foot, pushing costs to $600–$1,800 including labor and cleanup. Budget extra for removal at $2–$4 per square foot if redecorating soon.
DIY vs. Hiring Pros for Installation
DIY wallpaper installation shines for budget and skill-building, perfect for small spaces or simple patterns where you control the pace—expect 1–3 days total.
Professionals excel in complex jobs like murals or full-room overhauls, wrapping up in hours with guaranteed perfection. If time’s short or patterns intimidate, their expertise pays off.
Maintenance Tips Post-Installation
Sustain your wallpaper installation investment with simple habits. Dust lightly monthly using a microfiber cloth, and spot-treat stains promptly with diluted soap on vinyl types.
Steam-clean cautiously for tougher grime, skipping abrasives entirely. Good airflow prevents moisture buildup, extending life to 10–15 years. Re-paste minor lifts as needed.
Troubleshooting Wallpaper Issues
Issues arise, but fixes are straightforward in wallpaper installation. For bubbles, prick with a pin, smooth out air, and dab paste underneath.
Lifting seams? Dampen lightly, apply paste, and reroll. Yellowing signals dampness—boost ventilation immediately. Act quick for lasting results.
Advanced Techniques for Pro-Level Installation
Go beyond basics for standout wallpaper installation. Murals need center-start alignment with custom templates for flawless repeats.
Textured grasscloth benefits from pre-trimmed backings, easing handling. These tricks mimic pro work at home.
Eco-Friendly Options in Wallpaper Installation
Green choices elevate modern wallpaper installation. FSC-certified papers and recycled vinyl minimize environmental impact, paired with low-VOC pastes for healthier air.
Peel-and-stick cuts waste dramatically. Sustainable picks align style with responsibility.
Wallpaper Installation in Different Rooms
Tailor wallpaper installation to room demands—soft patterns warm bedrooms with fabric backs for texture. Kitchens call for scrubbable vinyl against splatters.
Bathrooms thrive on waterproof grades, while accent walls simplify anywhere, focusing effort for big impact.
Seasonal Trends for Wallpaper Installation
2026 trends in wallpaper installation embrace earthy palettes, sharp geometrics, and metallic sheens for luxury. Maximalist layers invite bold experimentation—timeless florals persist too.
Conclusion
Mastering wallpaper installation empowers creative, affordable home refreshes that endure. From meticulous prep to clever troubleshooting, every detail crafts walls you’ll adore. Dive in confidently—your space deserves it.